
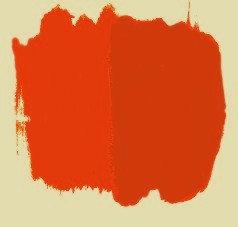
 Here is how I paint my miniature jack-o-lanterns Colors on my palette: (Delta Ceramcoat Acrylic Paints) Bright Red Opaque Yellow Golden Brown White Phthalo Blue Burnt Umber Dark Forest Green In general if you want a more natural look to your paints for things like apples, leaves, (pumpkins) you will get better results if you add a small amount of the base color's complimentary color into the mixture. This is why I have phthalo blue on my palette for the pumpkins. Start by mixing a base color for the pumpkin with 1 part red to 2 parts yellow (9 drops red and 18 drops yellow is a good amount to start with) then add a TINY amount of phthalo blue. (mix red and yellow and just barely dip one edge of paintbrush into the phthalo blue, then mix into orange). Phthalo blue is a very strong color, so a small amount will do. If you get too much blue in the mixture you will end up with brown instead of pumpkin orange - just add some more yellow and red to the paint mixture to fix this problem. This is a photo of the difference between pure orange (on the left), and orange with blue mixed in (on the right). I had a hard time trying to get the colors to show up accurately on the digital photo, but trust me, the color on the right is a much more natural pumpkin color. You'll just have to try it to see how much better the color looks with the addition of it's complimentary color. Now you have this puddle of basic pumpkin color - we are going to work from this for the other colors, starting with the color for the inside of the pumpkin. Pull some paint away from the puddle and add in 4 or 5 drops of yellow, 1 drop golden brown, and 4 or 5 drops white. In this instance, it's better to get the mixture too light than too dark, since for a miniature jack-o-lantern there is not going to be much actual light coming in from the front (if you are going to be lighting your jack, you might want to add a bit more yellow and golden brown if using a white light, or a bit more white if using an amber light). 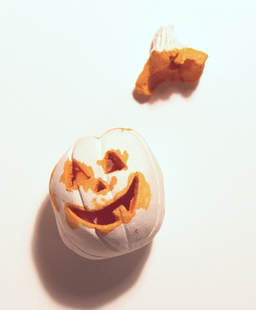 Paint the inside of the pumpkin, making sure to paint the edges of cut-out areas (and don't forget the top!) 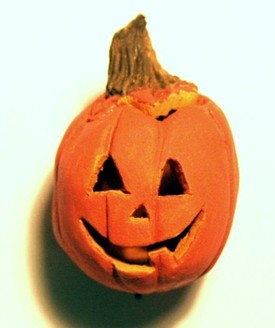 Next make another small puddle with about 1 part burnt umber and a small amount of dark forest green, then pull some of your base pumpkin color into the mixture. Make a wash of this color and apply to stem. Then paint the outside with your base pumpkin color. Brush a light wash of burnt umber over the entire jack-o-lantern, stem and all. This will deepen the colors, enhance the sculpting, and help blend the edges between the inside and outside colors. 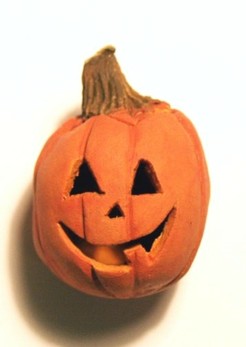 Next we are going to highlight the raised sections. Into your puddle of base color, mix a little white and yellow. Make a wash of this color and dry brush ACROSS the pumpkin, just hitting the raised areas. (it may seem like an oxymoron to "dry brush" a wash, but here is how to do it - create the wash, load your brush, then wipe most of it off on a paper towel before applying to pumpkin. If you can see brush strokes, you can blend them in with your fingertip.) When that layer of paint is dry, go over jack once more with a very light wash of the base color. Dry brush stem across the grain with a mixture of burnt umber and white. When those layers are dry, add a final light wash of burnt umber over the entire jack-o-lantern. 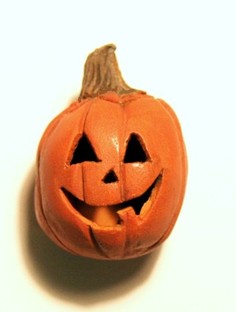 The final step is to let the paint dry, then buff with a piece of brown paper bag until the jack-o-lantern has a soft sheen.
7 Comments
8/4/2022 04:06:26 am
Edirne baymak servisi için hemen websitemize göz at! https://www.edirneklimaservisi.com/edirne-baymak-servisi/ 12/19/2022 03:32:04 pm
İnstagram takipçi satın almak istiyorsan tıkla. 1/4/2023 04:58:06 pm
100 tl deneme bonusu veren siteleri öğrenmek istiyorsan tıkla. Leave a Reply. |
TMS Club Members share their tips, pointers and projects.Archives
March 2023
Categories |
 RSS Feed
